
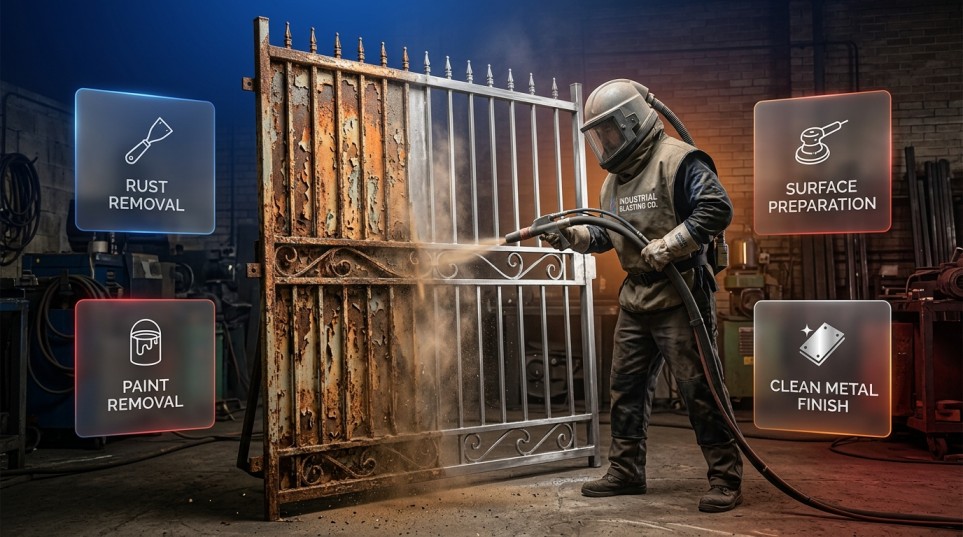
During gate blasting, hinges, locks, latches, and drop bolts are the parts most at risk, because every one of them has a hollow space that abrasive grit can get into. Left unprotected, grit packs into hinge barrels and lock keyways, strips out the grease that keeps them moving, and leaves bare metal that starts flash rusting within hours. Protected properly, the same hardware usually comes off the job working as well as it did before, and often better.
The difference is not the blasting itself. It is what happens in the hour before the compressor starts. On a wrought iron driveway or garden gate, a blaster should be deciding, component by component, what gets removed, what gets masked and sealed in place, and what gets blasted normally. That plan is what protects your hardware.
This guide walks through exactly what abrasive blasting does to each part of a gate’s hardware, how hinges and locks are protected before work starts, how media and pressure are adjusted around moving parts, and what needs to happen afterwards. If you are weighing up restoring an old gate rather than replacing it, this is the part of the job worth asking questions about.
What Happens to Gate Hardware During Blasting
Key Takeaways
- Abrasive grit is fine enough to enter any gap, and compressed air drives it deeper into anything hollow.
- Unprotected hardware stiffens, seizes, or jams. Protected hardware normally survives intact.
- The outcome is decided at the planning stage, not during blasting.
- Most gate hardware is either removed, masked and sealed, or blasted normally. There is no fourth option.
Blasting drives abrasive at a surface at high speed to strip paint, rust, and old coatings and to leave a clean, keyed surface for new paint. That works beautifully on flat bar, scrollwork and railings. It does not work on mechanisms, because a mechanism is a set of close-fitting parts with small clearances, and abrasive is designed to get into small spaces.
Here is what happens to each part of a typical gate, with and without protection.
| Component | What happens if it is left unprotected | How it is handled properly |
|---|---|---|
| Hinge barrels and pins | Abrasive particles inside; movement stiffens or seizes | Removed where bolt-on, masked and sealed where welded |
| Lock barrels and keyways | Grit enters the mechanism, key action jams | Lock removed, or keyway plugged and taped before blasting |
| Latches and drop bolts | Grit binds the slide, catch stops engaging | Detached and blasted separately, or masked in place |
| Strike plates and keeps | Surface cleaned, alignment unaffected | Blasted normally, alignment rechecked afterwards |
| Internal grease and lubricant | Stripped out by abrasive and air pressure | Mechanisms cleaned and re-lubricated after blasting |
| Bare metal inside mechanisms | Flash rust forms within hours | Coated or oiled the same day |
| Electric motors, wiring and sensors | Abrasive and dust damage components | Fully masked and sealed before work begins |
Why Properly Handled Hardware Comes Through Blasting Undamaged
Hardware survives because it is dealt with before any abrasive is fired, not because the blaster works carefully around it. Working carefully around a hinge barrel does not help much. Abrasive ricochets, dust drifts, and the air stream carries fine particles into places the nozzle never pointed at.
So the survey comes first. A blaster should walk the gate, operate everything, and note what moves, what is already stiff, what is bolted, and what is welded. That walk-round decides the method. It also flags problems that already exist, which matters, because a hinge that was seized before blasting will still be seized afterwards, and you both want that recorded up front.
One honest caveat: no blaster can promise that every original fixing will survive removal. Bolts on a fifty-year-old gate are often corroded into place and can shear when they are undone. That is a normal part of restoration work, not a failure, but it is worth agreeing beforehand who sources replacements and whether you want like-for-like or modern equivalents.
What Happens to Gate Hinges During Blasting
Key Takeaways
- Hinge barrels are hollow tubes with tiny clearances, which makes them the single worst place for grit to end up.
- Grit mixed with old grease becomes a grinding paste that wears the pin.
- Blasting a bearing surface roughens it, and roughness on a moving part means wear and squeak.
- Bolt-on hinges come off. Welded hinges get masked. The two are never handled the same way.
Abrasive Grit Inside Hinge Barrels
A hinge barrel is a tube wrapped around a pin, with a clearance measured in fractions of a millimetre. Blasting abrasive is finer than that gap. Once grit finds the open end of a barrel, air pressure pushes it along the length of the pin, and it stays there.
The bigger problem is what it mixes with. Old gate hinges usually hold a residue of hardened grease and road dust. Add sharp abrasive to that, and you get a grinding paste sitting directly on the bearing surfaces. Every swing of the gate then grinds the pin and the bore a little more. This is why a gate can seem fine on the day and feel noticeably worse a few months later.
Seizing, Binding and Loss of Free Movement
The first sign is usually a change in how the gate feels. It swings less freely, it squeals, it no longer settles gently against the stop, or it needs a shove to get moving. On a pair of gates, one leaf starts to lag behind the other, and the leading edges stop meeting cleanly.
That matters beyond convenience. A heavy wrought iron gate that binds on its hinges transfers load into the hanging post and the welds. Over time you can end up with a dropped leaf, a cracked weld or a loosened post fixing, and those are far more expensive to put right than the hinge was.
Roughened Hinge Pins and Bearing Surfaces
Blasting deliberately creates a rough surface profile, because paint needs that texture to grip. On the outside of a gate, that is exactly what you want. On a hinge pin, it is the opposite of what you want, since a bearing surface needs to stay smooth.
If a pin is blasted while exposed, the finish that was polished by years of use gets keyed instead. The gate then runs metal on rough metal, which brings squeaking, faster wear,r and a hinge that needs lubricating far more often. Some modern gate hinges also run on nylon bushes, brass washers or sealed bearings, and those components do not tolerate abrasion or the heat of blasting at all. Where they are fitted, removal is usually the only sensible route.
Why Welded Hinges Are Handled Differently to Bolt-On Hinges
Bolt-on hinges can be taken off, blasted as separate components, cleaned, coated, and refitted. That is the cleanest outcome, because nothing needs masking and nothing gets trapped inside.
Welded hinges cannot come off without cutting them, and cutting means re-welding, re-aligning and re-hanging the gate. On a sound gate, that is unnecessary work, and it risks the alignment you already have. So welded hinges stay in place and get sealed instead, with the barrel ends closed off and the pin protected.
There is a third case worth knowing about, and it is the easiest of the lot. Many traditional gates hang on lift-off pintle hinges, sometimes called hook and band. The gate simply lifts up and off the pins on the post. Where that is how your gate is hung, the leaf can be taken away and blasted clear of the hardware, and the pintles on the post are handled separately.
What Happens to Gate Locks, Latches and Drop Bolts
Key Takeaways
- Lock mechanisms have tighter tolerances than hinges, so they jam sooner and are harder to clear.
- Ground sockets for drop bolts sit in the fall zone and fill with spent abrasive unless capped.
- Blasting strips lubricant out of any mechanism it reaches, even when no grit is left behind.
- Bare metal inside a mechanism flash rusts in hours, and interiors are hard to paint.
Grit Inside Keyways and Lock Barrels
A lock cylinder works because small pins or levers move against springs with very little clearance. Abrasive grains are a similar size to that clearance, so it takes very little contamination to stop a key from turning. The usual sequence is a key that feels gritty, then a key that needs forcing, then a key that turns halfway and stops.
Once grit is inside a cylinder, flushing it out is unreliable, and you may end up replacing the lock. That is an annoyance on a garden gate and a genuine problem on a driveway gate that is your only vehicle access. Padlocks and hasps are the simplest case here: take the padlock off and keep it indoors.
Latches, Strike Plates and Drop Bolt Housings
Slide latches, thumb latches, and drop bolts all run in guides or tubes, and those guides are open at both ends. Grit in a guide makes a latch stiff, and a stiff latch stops dropping under its own weight, which is exactly what a self-latching gate relies on.
The ground socket for a drop bolt deserves particular attention. It sits at ground level, directly in the fall zone where spent abrasive collects, and it is often already half full of grit and soil before anyone arrives. It should be capped or plugged before work starts and cleared out afterwards, or the bolt will not seat properly when the gate is rehung.
Strike plates and keeps are the easy ones. They are usually solid; they have no moving parts, and they can be blasted along with the rest of the gate. The only thing to watch is alignment afterwards, which is covered further down.
Loss of Internal Lubrication
Even where no grit stays behind, blasting near a mechanism strips out the grease and oil inside it. Abrasive scours it away and high-pressure air blows out what is left. The mechanism can look perfectly clean and still be running dry.
A dry mechanism wears faster, feels notchy, and corrodes from the inside, and that damage builds quietly. This is why re-lubrication is a standard part of gate blasting, not an optional extra. If a quote does not mention it, ask.
Exposed Bare Metal Inside Mechanisms
Blasting leaves clean, bare, chemically active steel. In the British climate,e that surface can begin flash rusting within hours, and faster in damp or humid conditions. Outside faces of the gate get primed quickly, so they are fine. The inside of a hinge barrel or a latch housing is the problem, because you cannot easily reach it with a brush or a spray gun.
The practical answer is protection on the same day, using an appropriate oil or protective film on working surfaces rather than paint. Painting inside a close-fitting mechanism is a mistake, since the film thickness itself can bind the moving parts. The right product depends on the hardware, so this is a question for whoever is doing the work.
Removing or Masking: How Gate Hardware Is Protected
Key Takeaways
- Removal is always better than masking where the component can come off safely.
- Every removed part should be labelled, bagged, and photographed in place before it comes off.
- Masking works, but it leaves a boundary line that has to be cleaned and coated separately.
- Automated gates are electrically isolated first, and the automation engineer usually handles the motor and sensors.
Detachable Locks, Handles and Drop Bolts
Anything held on with screws or bolts should come off: lock cases, escutcheons, handles, thumb latches, drop bolts, keeps and any decorative furniture. Removed hardware can then be cleaned by hand, blasted separately at a suitable setting, or simply set aside and refitted untouched.
Good practice is to photograph each item in position before it is removed, then bag the fixings with it and label the bag. That sounds fussy until you are refitting a Victorian latch and trying to work out which of four similar screws went where. It also means original fixings get reused rather than replaced with modern ones that look wrong.
Bolt-On Hinges
Bolt-on hinges usually come off too, but there is more to it than undoing the bolts, because the gate has to be supported while it is off its hangings. A heavy wrought iron leaf needs proper support, not a couple of bricks.
Adjustable hinges add one more step. Many have set positions or adjustment threads that were dialled in when the gate was hung, sometimes years ago and sometimes by trial and error. Mark those positions before removal, so the gate can be returned to its existing alignment rather than re-hung from scratch. Where adjusters are seized, forcing them can do more harm than leaving them alone, so that becomes a judgement call on the day.
Welded Hinges That Cannot Be Removed
Welded hinges are protected in place. The barrel ends are plugged and taped so nothing can enter along the pin, and the pin itself may be driven out first where it is a drift-fit type, which is much better than trying to seal around it.
Be aware of the trade-off. Masking leaves a small band of metal under the tape that does not get blasted, so it stays coated in whatever was there before. That band has to be cleaned by other means and brought into the coating system afterwards, or it becomes the spot where rust creeps back first. A blaster who talks you through how they will deal with that edge is telling you something useful about their standard of work.
Sealing Keyways and Mechanical Openings
Where a lock genuinely cannot be removed, the opening is sealed rather than left open. That typically means a plug or bung in the keyway, then tape over the escutcheon, then a wrap over the whole assembly, so there are layers rather than one thin barrier that can be cut by ricocheting abrasive.
Sealing should be checked after blasting and before coating, by actually operating the lock with the key. Finding a stiff cylinder at that stage is inconvenient. Finding it after the gate is coated and rehung is much worse.
Motors, Wiring and Sensors on Automated Gates
Automated gates raise the stakes, because the components are both delicate and expensive. Ram or underground motors, gearboxes, limit switches, safety photocells, safety edges, induction loops, keypads and intercoms are all vulnerable to abrasion and to fine dust, which travels much further than the grit itself.
The gate should be electrically isolated before any work starts, and that isolation should be done by someone competent to do it. In many cases, the sensible route is for the automation engineer to disconnect and remove the motor and sensors, with the blaster masking anything that has to stay. Powered gates are treated as machinery in the UK and are normally force tested and safety checked after work that changes how the leaf moves, so plan for the automation specialist to return once the gate is coated and rehung.
How Abrasive Media and Pressure Are Adjusted Around Hardware
Key Takeaways
- No single abrasive suits every job. Media is chosen for the substrate, the coating, and the finish required.
- Aggressive media at high pressure near thin sections and fine detail can erode or distort them.
- Gentler methods exist, but each has a trade-off, including flash rust risk with wet processes.
- Original period hardware is rarely replaceable like-for-like, so it is worth protecting properly.
Why Media Choice Matters Near Moving Parts
Abrasives differ in hardness, shape, and size, and those differences change the result. Angular media cut and leave a sharp profile. Rounded media peen and leave a smoother finish. Harder media strip faster and hit harder. Options in common use include mineral abrasives such as garnet, aluminium oxide, steel shot and grit, glass bead, crushed glass, and softer media such as soda.
Which one is right depends on the substrate, the coating being removed, how much corrosion is present, and what profile the new paint system needs. That is a project decision, not a rule of thumb. Near hardware, the point is simply that the wrong combination of aggressive media and high pressure can erode fine detail, distort thin sections, and roughen surfaces that were meant to stay smooth.
Gentler Blasting Methods for Delicate and Period Hardware
Where components are delicate, the usual approach is to reduce aggression rather than change the whole plan: lower pressure, softer media, a wider standoff distance and a shallower angle of attack. Soda blasting and glass bead work more gently on softer or finer items, and wet or vapour methods knock down dust considerably.
Each has a catch, and you should hear about it. Softer media may not fully remove hard old coatings, so the result depends on what is on the gate. Wet methods introduce water to bare steel, which means flash rust has to be actively managed with inhibitors and prompt drying. There is no method that is gentle, fast, thorough, and risk-free all at once, and anyone telling you otherwise is selling rather than explaining.
Why Original Victorian Hinges and Latches Are Worth Preserving
Original hardware on a period gate is usually handmade, and it shows: tapered sections, hammer marks, slightly irregular scrollwork, forge welds. Modern replacements are typically cast or laser-cut from mild steel, and even good reproductions rarely match that character. They also rarely match the existing fixing holes, which means new holes in old ironwork.
There is a practical point as well. Genuine wrought iron is a different material from modern mild steel, and old hardware that has survived a century has already proved itself. Replacing it is a one-way decision. Protecting it during blasting costs an hour of preparation.
One thing to check before any restoration work: if your property is listed, or the gate sits within a conservation area, altering or replacing historic ironwork may need consent. Your local planning authority is the right first call, and it is a much easier conversation before the work than after it.
What Happens to the Hardware After Blasting
Key Takeaways
- Mechanisms are blown through and worked by hand to clear residual abrasive before anything is refitted.
- Re-lubrication is mandatory, and the right lubricant depends on where the part sits.
- New coating adds thickness, so swing, latch, and lock engagement are rechecked after rehanging.
- Bare hardware should be protected the same day, before flash rust takes hold.
Clearing Residual Grit From Mechanisms
After blasting, every mechanism that was near the work gets blown through with clean, dry air and then operated by hand, repeatedly, so that anything trapped inside works its way loose. Hinges are swung, latches are slid, keys are turned. Grit that only shows up under movement is exactly the grit you need to find.
This happens before coating and before refitting, never after. It is also worth knowing that hardware often stays off the gate through the coating stage as well, because powder coating ovens and hot dip galvanising baths are no kinder to lock springs and plastic components than abrasive is.
Re-Lubricating Hinges, Locks and Moving Parts
Once mechanisms are clean, they are lubricated again, and the choice of lubricant matters more than people expect. Heavy grease is excellent inside an enclosed hinge barrel and poor on an exposed pin outdoors, where it collects dust and grit and turns into a paste. Dry film lubricants suit exposed and dusty positions better. Lock cylinders have their own requirements and generally dislike thick oils.
Where hinges have grease nipples, they get greased through properly rather than wiped over. The aim is a mechanism that moves the way it did before the job, or better.
Rechecking Swing, Alignment and Lock Engagement
New coating has thickness, and gate hardware often works to close tolerances. Paint systems add a modest amount, and galvanising adds noticeably more. On a latch or a keep that was already a snug fit, that can be enough to make it bind.
So the gate gets rehung and then checked properly: does each leaf swing freely through its full arc, does the latch drop under its own weight, does the lock throw without anyone lifting the leaf, does the drop bolt find its ground socket cleanly. Where something is tight, the fix is adjustment or easing the keep, not forcing the mechanism. On a pair of gates, the meeting edges get checked too, since a small change on the hanging side shows up as a visible gap at the centre.
Coating Exposed Hardware Before Rust Returns
Blasted steel does not stay clean, so the window between blasting and protection should be short. Outer surfaces of hardware are primed and coated with the rest of the gate. Working surfaces that cannot be painted, such as pin bores and lock internals, are protected with oil or an appropriate film instead.
It is worth being clear about what this does and does not achieve. Blasting removes rust and old coatings and creates a surface a new system can grip. It does not make a gate rust-proof. How long the finish lasts depends on the coating system chosen, how well it was applied, the exposure the gate gets, and whether it is maintained. A gate near a busy road in Reading and a sheltered garden gate will not weather at the same rate, and neither will maintenance-free.
What to Tell Your Blaster Before Work Starts in Reading
Key Takeaways
- Say up front which hardware is original and must be kept.
- Flag automation, existing faults and access constraints before the day.
- Ask how hardware will be protected, cleared and re-lubricated, and get it in the quote.
- Mention old paint layers, so the contractor can assess and control them properly.
A short conversation before work starts prevents most hardware problems. Whether you are in Reading itself or elsewhere across Berkshire, these are the things worth raising when you book a survey or request a quote for gate sandblasting:
- Which hardware is original and which has been replaced, and which pieces you want kept, whatever happens.
- Is the gate automated, who installed the system, and is there a manual release you rely on?
- Existing faults: a hinge that already binds, a lock that is already stiff, a leaf that already drops.
- Keys and spares: hand over spare keys, or confirm the lock is coming off, so nothing is locked shut mid-job.
- Security and access during the work: whether the opening must stay usable or securable overnight.
- The coating you want afterwards, since paint, powder coating and galvanising differ in thickness and in how hardware is handled.
- Age and paint history: gates painted decades ago may carry lead-based coatings, which need proper assessment and controlled removal rather than DIY scraping or sanding.
- Access: gate width, ground surface, nearby cars, planting and neighbouring boundaries all affect whether work happens on site or off site.
Then ask the contractor three direct questions: which hardware will be removed and which masked, how mechanisms will be cleared and re-lubricated afterwards, and whether alignment and lock engagement are rechecked once the gate is rehung. Clear answers to those three tell you a great deal about how the job will be run.
One more practical note. Blasting produces airborne particles and spent abrasive, so containment, sheeting and clear-up are part of any properly planned job on a domestic driveway. Ask how that will be managed at your property, particularly if you have close neighbours, a shared drive or planting you want protected.
Conclusion
Gate hinges and locks are the parts of a gate blasting job that reward planning most. Abrasive will find any opening, strip any lubricant, and leave bare metal that starts rusting the same day. None of that is a reason to avoid blasting an old gate. It is a reason to make sure the hardware is dealt with deliberately: removed where it can be, sealed where it cannot, then cleaned, lubricated, refitted and rechecked once the coating is on.
Handled that way, a tired wrought iron gate can be stripped back to clean metal and recoated while keeping the hinges, latches and locks it was built with. That is usually the better outcome than replacement, both for the look of the gate and for what it costs.
If you have a gate in Reading or the wider Berkshire area and you are unsure whether its hardware can be saved, the sensible next step is an assessment rather than a guess. Blastec Sandblasting Services can look at the gate, talk through how the hinges, locks and any automation would be handled, and set out what the work would involve before you commit to anything.