
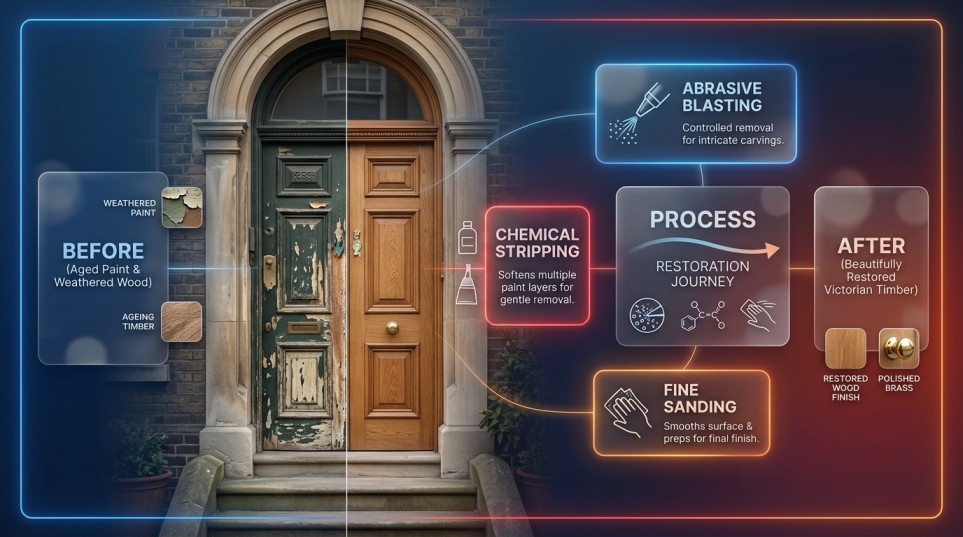
The short answer: for a Victorian panelled front door with several layers of old paint, controlled low-pressure media blasting or careful chemical/poultice stripping usually gives the best balance of detail preservation and timber safety. Hand sanding suits light paint build-up only, and caustic dipping is the highest-risk option because of what it does to animal-glue joints, putty, and panel movement. The right method depends on the door’s condition, how many paint layers it carries, and whether any of that paint contains lead.
Key takeaways
- Assess the door first. Joint condition, rot, original glass, and paint history decide the method, not cost or convenience.
- Any Victorian door is likely to have lead-based paint in its lower layers. That changes how the work must be done, contained and disposed of.
- Detail preservation is where methods separate. Mouldings, bolection profiles and arris edges are easy to lose and impossible to put back.
- Dipping is fast and cheap for a reason. The trade-offs land later, in loosened joints and paint that fails early.
- Removing paint is roughly half the job. Repair, drying, priming, and finishing all affect the timeline and the final cost.
Assess the Door Before You Remove Any Paint
The single most common mistake in Victorian door restoration is choosing a removal method before anyone has properly looked at the door. Two doors from the same terrace, made in the same year by the same joiner, can need completely different treatment depending on how they’ve been repaired, repainted and weathered over 130 years.
Spend an hour on assessment. It costs nothing, and it prevents the expensive outcomes.
Timber, Joints, Panels and Mouldings
Most Victorian front doors are softwood, typically slow-grown pine or Baltic redwood, with a small number in oak or mahogany on higher-status properties. The construction is mortice-and-tenon: stiles, rails and muntins framing floating panels, with the joints traditionally drawn together with wedges and pegs and glued with animal (hide) glue.
Three features matter for method selection:
The panels float. They sit in grooves and are meant to move with seasonal humidity. They are usually thinner than the frame, sometimes considerably so, and they’re the first place an aggressive method does damage.
The mouldings carry the character. Bolection mouldings, ovolo and ogee profiles, applied beads and the crisp arris where a stile meets a panel are what make the door read as Victorian. Once a profile is rounded over, no amount of finishing brings it back.
Slow-grown softwood has a hard/soft grain structure. The dense latewood bands resist abrasion; the softer earlywood between them does not. Any method that works by abrasion, blasting or sanding, can cut the soft bands faster than the hard ones and leave a corrugated, washboard surface if pressure, media or technique aren’t right for the timber.
Check whether the door is original at all. Plenty of “Victorian” doors in Berkshire terraces are 1970s or 1990s replacements in the Victorian style, often in less stable timber or with modern adhesives. That changes the calculation on both method and whether restoration is worth it.
Rot, Cracks, Woodworm and Previous Repairs
Work systematically from the bottom up, since that’s where water goes.
- Bottom rail and the foot of each stile. Press firmly with a bradawl or screwdriver tip. If it sinks in easily, you have wet rot under the paint. Paint can bridge over surprisingly advanced decay.
- Joint lines. Look for hairline gaps at the shoulders of the rails, or paint cracked along a joint. That usually means the joint has already opened and the paint is the main thing holding the line.
- Panels. Splits running with the grain, or a panel that has shrunk enough to show a bare unpainted line at its edge, tell you how much the door has moved.
- Woodworm. Flight holes with clean, pale edges and fresh frass suggest active infestation; grey, paint-filled holes are historic.
- Previous repairs. Filler, resin repairs, glued-in patches, screws through joints, metal strapping. These react very differently to chemicals and to abrasion than the surrounding timber, and some fillers dissolve, swell or discolour when they meet caustic or solvent strippers.
A door with sound joints and one rotten bottom rail is a straightforward restoration. A door with three opened joints, two split panels and a history of filler repairs may be better served by a gentler method, or may be past the point where stripping is the useful question.
Original Glass, Putty and Door Furniture
Victorian front doors frequently carry glazing worth more than the door: etched, acid-frosted, flashed ruby or blue glass, coloured margin lights, or early patterned rolled glass. None of it is replaceable like-for-like, and all of it is fragile.
Points to check before choosing a method:
- Putty condition. Old linseed putty goes hard and brittle. Both chemical strippers and blast media find their way into shrinkage gaps around the rebate, and softened or displaced putty means the glass has to be re-bedded afterwards.
- Etched and frosted surfaces. An etched face is a roughened surface with directional detail. Abrasive media can abrade it further or leave it cloudy, and there is no repair. Any blasting near original decorative glass needs proper masking and shielding, and in some cases the sensible answer is removing the glass first or excluding it from the treatment.
- Glazing bars and margin bars. Thin, delicate, and where most of the paint build-up sits.
- Door furniture. Rim locks, letterplates, knockers, original knobs, hinges and finger plates should come off before any stripping. Cast brass and iron respond differently to caustic and to abrasion, and painted-over original ironmongery is often in better condition than it looks.
If the glass is significant and can’t be removed, that alone can rule out dipping and push the work toward a hand-applied stripper or shielded, localised blasting.
How Many Paint Layers, and Is It Lead?
Take a scalpel or sharp chisel and cut a shallow bevel through the paint in an inconspicuous area, the bottom of a stile, or the hinge edge. You’ll see the layers in section like tree rings. Victorian doors commonly carry anywhere from six to twenty coats.
That count matters more than people expect:
- Light build-up (roughly 1–4 coats, detail still sharp). Hand methods and careful sanding are realistic.
- Moderate build-up (5–10 coats, mouldings softening). Stripping or controlled blasting both viable.
- Heavy build-up (10+ coats, profiles buried, panel edges lost). Hand sanding becomes impractical; chemical or blasting methods do the work.
On lead: assume it’s there. Lead pigments, white lead, and red lead in primers were standard in UK decorative and exterior paint for most of the period these doors were painted. Lead in consumer decorative paint was restricted in the UK in 1992, and it had been declining for decades before that, but the lower layers on a Victorian door were almost certainly applied when it was normal. Red or pink primer layers next to the bare timber are a particular flag.
You can confirm with a swab test kit from a DIY merchant (rhodizonate or sulphide types), though these only test the surface you expose; cut through to each layer and test separately. Professional XRF testing gives a more reliable picture. What you should not do is assume the absence of lead because the top coats are modern acrylic.
The lead finding doesn’t automatically rule any method in or out, but it dictates how the work is contained, how dust is controlled, what protection is needed, and how the waste is handled. That’s covered in detail further down.
How Each Method Works on a Panelled Door
Blasting: Soda, Walnut Shell and Low-Pressure Media
“Sandblasting” is used as a catch-all term, but the media and pressure used on timber are a long way from what’s used on structural steel. Silica sand and hard mineral grit have no place on a Victorian door.
Soda blasting uses sodium bicarbonate, a soft, friable medium that fractures on impact rather than cutting. It lifts paint by that fracturing energy rather than by abrading the substrate, which is why it’s used on softer materials. It’s comparatively gentle on timber grain and good at following mouldings and carved detail.
Its limitations are real and worth knowing before you commit:
- Soda is alkaline. Residue left in the grain will affect the pH of the surface and can interfere with the adhesion or curing of some finishes, so the door needs thorough rinsing and neutralising before anything goes on it.
- Soda residue damages plants and grass, which matters if work is done on site.
- On very thick, hard, multi-layer oil paint, soda can be slow, and slow means more passes and more exposure for the timber.
Walnut shell is a crushed organic medium, harder than soda and more effective at cutting through stubborn layers, with good detail-following ability. Because it’s more aggressive than soda, technique and pressure control matter more on thin panels.
Low-pressure and wet or vapour-assisted blasting reduce airborne dust substantially compared with dry methods by binding particles in water. They reduce dust; they don’t eliminate it, and the resulting slurry still needs collecting and disposing of appropriately, particularly with lead-based paint in the mix.
On any panelled door, the operator’s control is the variable that decides the result. Media choice, pressure, nozzle distance and angle, and how long the nozzle dwells on one spot all affect whether you get clean, crisp timber or raised grain and softened profiles. This is not a setting you can look up; it’s judged against the specific door, in test areas, and adjusted. That’s also why the same “soda blasting” label covers both excellent and poor outcomes depending on who is holding the nozzle. Our wooden door sandblasting service page covers how we approach timber specifically.
Suits: heavy multi-layer paint, deep or elaborate mouldings, doors where hand methods would take days.
Less suited to: doors with fragile original glass that can’t be removed, very thin or already-split panels, and, without proper containment, anything with lead paint.
Chemical, Poultice and Hand Stripping
Chemical stripping works by softening or swelling the paint film so it can be scraped and wiped away rather than abraded off. Done properly, it’s the method with the least mechanical impact on the timber surface.
Solvent and modern DCM-free strippers are brushed on, left to dwell, then scraped off. They require multiple applications on a door with many layers, sometimes five or six rounds,s which is where the time cost comes from. The by-product is a quantity of paint sludge that has to be collected rather than dropped on the ground.
Poultice strippers are the specialist option for heritage work. A thick paste is applied and covered with a laminated cloth or film, then left for hours or days. It holds the active agent against the paint long enough to penetrate multiple layers in one go, and when the cloth is peeled off, most of the paint comes with it. The key advantage for a Victorian door is that the softened paint and the residue lift off together rather than becoming loose dust, which is exactly why poultice systems are widely used on lead-painted historic joinery.
The main points against: dwell times are long, the materials cost more, some systems are alkaline and will darken oak or draw tannins, and the timber needs neutralising and thorough drying afterwards. Stripper that gets into open joints or under mouldings can keep working after you think you’ve finished.
Hand scraping with cabinet scrapers, shave hooks and moulding scrapers is slow but precise, and it’s genuinely the best method for cleaning up profiles after a chemical application. The risk is gouging with the corner of a scraper on softwood, particularly across the grain.
Suits: doors with lead paint, doors with fixed original glass, doors where the mouldings are the priority.
Less suited to: anyone in a hurry, and doors with heavy filler repairs that will react unpredictably.
Hand Sanding vs Power Sanding
Sanding works by abrasion, removing paint and the surface of whatever is beneath it in the same action. That’s the fundamental limitation on a period door: it takes material off the door.
Hand sanding with block and paper is controlled and safe for the profiles, but on ten layers of hardened oil paint it’s punishingly slow, papers clog almost immediately on softened or waxy paint, and it’s easy to round an arris without noticing.
Power sanding– orbital, random orbital, detail sanders- is faster but riskier. Flat sanders don’t fit into mouldings or panel corners, so you end up flattening the field areas and leaving paint in the detail, then trying to close the gap with hand tools. A belt sander or aggressive disc will dish a Victorian panel in seconds.
The critical point on Victorian doors: dry sanding lead paint generates fine lead dust, and a power sander distributes it across a wide area very efficiently. This is the combination public health guidance specifically warns against. If there’s any chance of lead, sanding is not the method to reach for casually.
Suits: light paint build-up, final surface preparation after another method has done the removal, small localised areas.
Less suited to: heavy paint build-up, any lead-painted door, and any door where detail preservation is the objective.
Door Dipping: The Highest-Risk Option for a Victorian Door
Door dipping, immersing the whole door in a hot caustic soda tank, is the cheapest and fastest way to get paint off a door. It’s also the method that causes the most avoidable damage to Victorian joinery, and the damage often doesn’t reveal itself for months.
This isn’t an argument that dipping is never appropriate. It’s an argument that a Victorian panelled front door is close to the worst candidate for it.
What Caustic Does to Animal-Glue Joints, Putty and Panels
Victorian doors were assembled with animal glue hide or bone glue, water-soluble and protein-based. Hot caustic solution is very efficient at breaking down exactly that kind of protein adhesive. A door that comes out of a dip tank may look intact and still have joints that are now held together mainly by the wedges and the pegs, with the glue line compromised. Over the following seasons, as the door takes up and gives off moisture, those joints work loose, the shoulders open, and the door racks.
Immersion also floods the timber. Softwood absorbs a great deal of water in a hot tank. Panels swell in their grooves while the frame swells around them, and as the door dries out unevenly, because thicknesses differ, you get splits, cupped panels, and shrinkage gaps that weren’t there before. The fastest failures come from doors that are stripped, dried too quickly, and repainted before the moisture content has genuinely settled.
Putty and glass rarely survive well. Old linseed putty softens and washes out. Thermal shock going into and out of a hot tank can crack original glass, and etched or flashed decorative glass may come back cloudy or etched further.
Fillers, resin repairs and previous patches react unpredictably; some dissolve, some swell, some survive and then fall out weeks later.
Which Doors Can Be Dipped, and Which Shouldn’t
Reasonable candidates for dipping:
- Plain, modern, glued-and-doweled internal doors of no particular value
- Doors already stripped of glass and ironmongery, where a loosened joint can be knocked apart and reglued anyway
- Situations where the door is being dismantled for full reassembly by a joiner
Poor candidates:
- Victorian and Edwardian panelled front doors with original animal-glue joints
- Any door with original glazing still in place
- Doors with existing open joints, splits or rot; immersion accelerates all three
- Doors with decorative applied mouldings, which can detach as the glue behind them fails
- Oak and other tannin-rich timbers, which caustic darkens and stains
If a supplier describes their process as “caustic dipping” or “hot tank” for a Victorian front door without asking about joints, glass or what you intend to do afterwards, that’s a useful signal about how the work will be approached.
Residual Caustic and Why New Paint Fails Later
This is the part most homeowners only discover two years on, and it’s the single most useful thing to understand about dipping.
Caustic soda doesn’t just sit on the surface; it penetrates the timber. Unless the door is properly neutralised (usually with an acid rinse) and then thoroughly rinsed again, alkaline salts remain in the grain. Those salts are hygroscopic: they attract moisture from the air and hold it in the surface layers of the timber.
The consequences show up in the finish:
- Alkalinity attacks oil-based paint films from beneath, breaking down the binder- the same chemistry that makes caustic strip paint in the first place- running slowly.
- Retained moisture prevents proper adhesion and pushes the new film off the surface.
- Salts can migrate out through the coating as it cures and leave a crystalline bloom.
- The result is peeling, blistering or flaking paint on a door that was supposedly stripped “back to bare timber”.
Timber also needs real drying time after immersion, in practical terms, weeks rather than days in a heated indoor space, and a moisture meter reading well down before any primer goes on. Doors that are dipped on Monday and painted on Friday are the ones that fail.
The same principle, incidentally, applies to any alkaline method. Soda blasting leaves an alkaline residue too, and it also needs rinsing and neutralising before finishing. The difference is one of degree: surface residue from a dry process versus solution driven deep into saturated timber.
Blast vs Strip vs Sand: Side by Side
Relative cost is shown as bands rather than figures, because door restoration pricing varies with condition, size, paint history, and what happens after stripping. Figures should come from a quote on your actual door.
| Method | Paint layers handled | Detail preservation | Grain impact | Lead-safe? | Door downtime | DIY-able | Relative cost |
| Soda blasting | Moderate to heavy | Very good | Low–moderate; depends on pressure and technique | Only with containment, capture and waste control | Short (typically days) | No | ££ |
| Walnut shell blasting | Heavy | Very good | Moderate; needs careful control on thin panels | Only with containment, capture and waste control | Short (typically days) | No | ££ |
| Wet / vapour-assisted blasting | Moderate to heavy | Good | Low–moderate | Better than dry blasting; slurry still needs handling | Short–medium (drying time) | No | ££–£££ |
| Hand-applied chemical stripper | Light to moderate; repeat coats for heavy | Good with careful scraping | Very low | Yes, if waste is collected and contained | Medium (multiple applications) | Yes, with care and ventilation | £–££ |
| Poultice stripping | Heavy, often in one application | Very good | Very low | Among the better options; paint lifts with the cloth | Medium–long (long dwell times) | Possible but costly in materials | £££ |
| Hand/power sanding | Light only | Poor on mouldings | High; removes surface timber | No, dry sanding lead paint is the method to avoid | Long if attempted on heavy paint | Yes, but rarely appropriate here | £ |
| Caustic dipping | Heavy, very fast | Moderate; risk to applied mouldings | High; saturation, raised grain, swelling | Paint is captured, but joint and timber risk is high | Short strip, long drying | No | £ |
Preserving Original Timber, Mouldings and Detail
Detail is lost in two different ways, and they call for different precautions.
Abrasive loss is gradual rounding of edges and profiles. It comes from sanding, from blasting with media that’s too hard or pressure that’s too high, and from dwelling in one place. The tell is a soft, slightly blurred arris and mouldings that have lost their shadow lines. It’s cumulative across every restoration the door has ever had; a door stripped and sanded three times over a century has measurably less profile left than one that’s simply been repainted.
Structural loss is the applied bead that falls off, the split panel, the joint that opens. It comes from saturation, from glue failure and from moisture movement.
Practical protections, whichever method you choose:
- Ask for test patches in an inconspicuous area before the whole door is treated.
- Keep sanders off mouldings entirely; clean profiles with shaped scrapers and hand papers.
- Treat panel fields as the most vulnerable areas, not the most convenient flat ones.
- Accept a small amount of residual paint in deep profile corners rather than pushing a method harder to chase it. A trace of paint in a quirk is invisible under a new finish; a rounded moulding is permanent.
Handling Multiple Paint Layers and Oil vs Water-Based Paint
Paint types don’t behave the same way, and a Victorian door usually has both.
Oil-based paints and traditional lead-containing oil paints harden and embrittle with age. Old, brittle oil paint often responds well to blasting because it fractures and releases cleanly. It responds to solvent strippers too, though multiple layers slow the process. It clogs abrasive papers when partly softened.
Modern water-based acrylics and vinyls stay comparatively flexible. Flexible films are harder to blast off; the impact energy is absorbed rather than fracturing the film, and they can gum up under heat or friction. Some respond poorly to strippers formulated for oil systems.
Mixed stacks, which is what you’ll actually have, mean no single approach removes everything at the same rate. Expect the acrylic top layers and the hard old oil layers beneath to come off at different speeds. That is a normal part of the job, not a sign anything has gone wrong, and it’s one of the reasons an accurate quote follows an inspection rather than a photograph.
A practical note: heat guns. They’re fast on oil paint, but heating lead paint volatilises lead compounds and produces fumes as well as dust. They also scorch softwood and can ignite dust and debris in rebates and behind mouldings. On a lead-painted period door, a heat gun is not the shortcut it appears to be.
Which Is Realistic for DIY
Honestly assessed:
Reasonable DIY: hand-applied chemical stripping on a door you’ve confirmed has no lead, with good ventilation, correct protective equipment, and all waste collected. Careful hand sanding as a final preparation step. Removing and cleaning ironmongery. Final finishing.
Possible but demanding: poultice stripping. The technique isn’t difficult, but the materials are expensive, dwell times are long, and you need somewhere the door can sit undisturbed and sheltered for days.
Not realistic DIY: any form of abrasive blasting, which needs the equipment, containment, and, most importantly, the judgement about media and pressure that only comes from doing it repeatedly on timber. Also: stripping any lead-painted door without proper containment, dust control and a disposal route.
The strongest argument for doing part of it yourself is that the finishing stage- filling, fine sanding, priming, and painting- is where most of the visible quality lives, it’s genuinely achievable, and it’s a significant share of the total labour.
Lead Paint Safety and Legal Duties
Lead exposure is a health hazard, and children under six and pregnant women are the groups at highest risk. The exposure route that matters most in door stripping isn’t the intact paint on the door; it’s the dust and debris created when you disturb it, which settles on floors, gets carried indoors on shoes and clothing, and contaminates soil around the work area.
Why Dry Sanding and Abrasive Blasting Are the Worst Options for Lead
The ranking is about dust generation, not about the methods themselves.
Dry power sanding is the worst combination available: it converts solid paint into fine, respirable, widely distributed dust, and a sander’s extraction port catches only part of it. Domestic vacuum cleaners without HEPA filtration redistribute the fine fraction back into the room.
Dry abrasive blasting likewise turns the coating into fine particulate, mixed with spent media, across a large volume of air. Done in the open, on a driveway, in a garden, it contaminates the surrounding area, the soil and neighbouring properties. That’s the reason this work belongs in a contained facility rather than on site: enclosure, controlled extraction, filtration and collection of spent media and paint residue together as one waste stream. The method isn’t the problem; uncontained dust is.
Heat guns and burning off volatilise lead compounds and add fume to the dust.
Wet and chemical methods sit at the safer end because the lead stays bound in liquid, sludge or a peeled poultice rather than becoming airborne. Poultice systems in particular are widely used on historic lead-painted joinery for precisely this reason; the paint leaves with the cloth.
Containment, PPE and Waste Disposal
If you’re doing any lead-paint work yourself:
- Set up first. Work outdoors or in a well-ventilated space with heavy-duty sheeting below and beyond the work area. Keep children, pregnant women and pets away entirely for the duration and until the clean-up is complete.
- Choose wet or chemical methods. Don’t dry-sand and don’t use a heat gun.
- Protection. A properly fitted respirator rated for particulates, not a dust mask, plus disposable coveralls, gloves and eye protection. Remove and bag coveralls at the work area, not indoors.
- No eating, drinking or smoking in the work area, and wash hands and face thoroughly afterwards.
- Clean up wet. Collect sheeting and debris carefully; damp-wipe rather than sweep or dry-vacuum. Use a HEPA-filtered vacuum only.
- Waste. Lead-contaminated paint waste, sludge and sheeting shouldn’t go in the household bin. Contact your local authority, Reading Borough Council, Wokingham, West Berkshire, Bracknell Forest, Slough or Windsor and Maidenhead, depending on where you are, to confirm the correct hazardous waste route for your area before you start rather than after.
A note on the legal position: the Control of Lead at Work Regulations 2002 place duties on employers and the self-employed when work is liable to expose people to lead. They govern professional work rather than a homeowner working on their own property, but the risk to your household is the same either way, and the practical controls the regulations require are the ones worth copying.
When It Has to Go to a Professional
Consider taking the door to a specialist when:
- Lead is confirmed and you don’t have a suitable contained outdoor space and a disposal route
- Anyone in the household is pregnant, or there are young children
- The paint build-up is heavy enough that hand methods would take days
- The door has original decorative glass still in place
- Joints are already open, or there’s rot to deal with alongside the stripping
- The property is listed, or the door is a prominent feature in a conservation area
Cost, Timescale and How Long the Door Is Off
What Drives the Price
Pricing for Victorian door restoration is quoted per door after inspection, because the variables genuinely dominate:
- Paint layers and paint type. Number of layers, and whether they’re brittle old oil or flexible modern acrylic.
- Whether lead is present. Containment, controlled methods and hazardous waste handling all add to the work.
- Door size and complexity. A four-panel door with plain mouldings versus a six-panel door with bolection mouldings, margin lights and a fanlight.
- Glazing. Whether glass is removed, masked or worked around, and whether re-puttying is needed.
- Condition. Sound joints and no rot versus three open joints, a rotten bottom rail and historic filler repairs.
- Ironmongery. Removal, cleaning, refurbishment or replacement.
- Scope after stripping. Stripping only, stripping plus repairs, or full restoration through to finished door.
- Transport and access. Whether the door is collected and returned, and what’s done about the opening meanwhile.
Method-by-Method Cost Comparison
In relative terms, with the caveat that scope matters more than method:
- Dipping is the cheapest per door by a clear margin. The saving is real; so is the risk of joint failure, splits and paint failure that costs more to put right than the original saving.
- Hand sanding is cheapest in materials and most expensive in your own time. On heavy paint it’s rarely economic even at zero labour cost.
- DIY chemical stripping is low in cash cost, substantial in time, and the materials add up on a door with many layers.
- Professional blasting sits in the middle band. You’re paying for equipment, containment and control, and for speed.
- Professional poultice stripping is typically the most expensive per door, reflecting long dwell times and material costs, and it’s often the right answer for a lead-painted door with significant glazing or delicate detail.
- Full restoration, strip, repair, reglaze, prime, finish, refit, is a different order of cost from stripping alone, and it’s worth being clear which you’re comparing when you collect quotes.
Extra Costs: Repairs, Glazing, Hardware, Finishing
Stripping is frequently the smaller half of the bill. Budget for the possibility of:
- Joint repair. Re-wedging, re-pegging, knocking apart and re-gluing, sometimes only discoverable once the paint is off.
- Timber repairs. Splicing in new timber at a rotten bottom rail or stile foot; resin repairs; new mouldings matched to the originals.
- Panel repairs. Splits closed, or a panel replaced.
- Glazing. Re-puttying, re-bedding loose panes, or replacing broken glass , and matching original decorative glass is both difficult and expensive.
- Ironmongery. Stripping and refurbishing original brass or iron, or sourcing period-appropriate replacements. New hinges are often needed after a century of adjustment.
- Finishing. Primer, undercoat and two topcoats of a quality exterior system, or an appropriate stain or oil system.
- Draught-proofing and adjustment. A stripped door sits differently in its frame than a paint-built one, and usually needs easing and refitting.
- The opening while the door is away. A temporary door, boarding, or arranging the work around the time you can be present.
A realistic expectation: expect at least one unwelcome discovery under the paint. It’s rare that a Victorian door stripped for the first time in decades presents no surprises at all.
After Paint Removal
Neutralising, Cleaning and Drying Time
This stage gets rushed more than any other, and it’s where a good strip turns into a failed finish.
Neutralising. Alkaline processes, caustic dipping, and soda blasting to a lesser degree leave residues that must be neutralised and rinsed, typically with a dilute acid wash followed by clean water, before anything is applied. Skipping it is the direct cause of the peeling described earlier.
Cleaning. Media, dust and stripper residue lodge in mouldings, joint lines, hinge rebates and around glazing beads. All of it has to come out, or it contaminates the finish.
Drying. Any water-based process leaves the timber wet, and immersion leaves it very wet indeed. The door needs to sit flat, supported and evenly ventilated so it dries without cupping. Measure with a moisture meter rather than guessing: exterior joinery is generally worked and finished in the region of 12–16% moisture content in the UK, and a freshly dipped door can be well above that for weeks. Drying too fast with direct heat causes splitting; drying unevenly causes warping.
Repairing Joints, Rot and Mouldings
With bare timber in front of you, the real condition is visible for the first time. Work in this order:
- Assess the joints. Open shoulders, loose wedges, failed glue. Doing this before finishing is the whole point of stripping.
- Cut out decay. Rot has to be removed back to sound timber, not filled over. New timber spliced in should match species and grain direction where possible.
- Consolidate and fill. Consolidants for softened but sound timber; appropriate exterior fillers for small defects. Don’t fill a structural problem.
- Re-glue and cramp. Modern exterior adhesives are stronger than the original animal glue, though for genuinely significant historic joinery a conservation joiner may prefer a reversible traditional glue.
- Mouldings. Re-fix loose beads; have missing sections run to match the original profile rather than substituting the nearest stock moulding.
- Then reglaze, if glass came out.
Fine-Sanding and Priming Bare Timber
- Fine-sand lightly. Bare timber after blasting or stripping usually has raised grain. A light hand sand with a fine grit knocks it back. This is a smoothing step, not a removal step; keep away from raised grain and profiles with anything coarse.
- De-nib and dust off. Tack cloth or a vacuum with a brush attachment. Any dust left becomes a lump in the finish.
- Prime promptly. Bare exterior timber shouldn’t sit unprotected, and it certainly shouldn’t be left outdoors or hung unfinished. Aim to prime within a short window of final sanding.
- Prime all faces. Top and bottom edges of the door especially; they’re the moisture route, they’re almost always missed, and they’re where the rot you just cut out came from. Hinge rebates and lock mortices too.
- Check moisture first. Priming timber that hasn’t dried out traps the moisture under the film.
- Knots and resin. Softwood knots need appropriate treatment before priming, or resin bleeds through the finish.
Finishing the Restored Door
Exterior Paint vs Stain vs Oil on Period Timber
The finish should suit both the timber and the fact that this is a south-of-England front door facing the weather.
Paint is the historically correct choice for the vast majority of Victorian front doors, and it’s the most protective. A full system,-primer, undercoat, two topcoats,-gives an opaque, UV-blocking film. It hides repairs and filler, which matters after restoration work. The practical trade-off is that it eventually needs rubbing down and recoating, on a cycle of several years depending on exposure. Traditional oil-based systems give a deep finish and cure hard; modern water-based exterior systems offer flexibility and easier recoating. Colour is worth researching if the house is in a conservation area; period-appropriate dark greens, maroons, blues and blacks tend to look right on Victorian joinery for a reason.
Stain and translucent finishes show the grain. That’s only an advantage if the timber underneath is worth showing, which after a century of paint, with repairs and splices, it frequently isn’t. Softwood that’s been painted its whole life is often patchy, stained around old fixings, and marked at repairs. Stains offer less UV protection than opaque paint and need more frequent maintenance on a south or west elevation.
Oil finishes are more appropriate for hardwood doors, oak, mahogany, where the timber is the feature. They need regular reapplication, more often than paint, and on an exposed elevation that can mean annually.
One thing to settle early: if there’s any chance you want a stained or oiled finish, say so before stripping. It changes the acceptable tolerance for residual paint in the grain, and some methods leave the surface better suited to it than others.
Protecting the Door From Weather
- Seal all six faces, including top and bottom edges, the most common single failure point on restored doors.
- Don’t neglect the bottom rail. It takes the splashback and it’s where rot starts.
- Look after the weathering details. A sound weatherboard, drip and threshold do more for the door’s life than an extra coat of paint.
- Check the surroundings. A blocked gutter above the porch, a failed canopy or a splashing downpipe will defeat any finish.
- Inspect annually, particularly the bottom rail and the lower panel joints, and deal with small failures before water gets behind the film.
- Expect to recoat. Exposure, aspect and finish type set the interval; an exposed west-facing door needs attention sooner than a sheltered one in a deep porch.
Restore or Replace?
When Restoration Wins
Restoration is usually the better decision when:
- The frame is sound and the joints hold. A door with intact mortice-and-tenon joints has good structural life left, regardless of how bad the paint looks.
- The damage is localised. One rotten bottom rail, a couple of split panels, a tired finish, all repairable.
- The door is original to the house. Proportions, panel arrangement, moulding profiles and the timber itself are rarely matched by modern reproductions, and the difference is visible from the street.
- The property is listed or in a conservation area. Replacement may be constrained or may require consent; restoration usually isn’t.
- There’s original glass. Etched, coloured or flashed glass is effectively irreplaceable.
- The timber is slow-grown. Victorian softwood is generally denser and more stable than modern fast-grown equivalents.
- Thermal performance is fixable. Draught-proofing, a decent threshold, a letterplate brush and a heavy curtain address most of the practical complaint about period doors.
When Damage Is Beyond Economic Repair
Replacement becomes the realistic answer when:
- Multiple joints have failed and the door is racked out of square
- Rot is extensive through stiles and rails rather than localised
- Panels are split or perished across most of the door
- Previous repairs have compromised the structure, over-filled, over-screwed, patched with unsuitable materials
- The door isn’t original, a 1980s replacement in the Victorian style rarely merits full restoration cost
- Security or fire requirements can’t be met by the existing door in its setting
Get the assessment before you decide. Doors that look beyond saving under twenty layers of cracked paint are often structurally sound, and doors that look fine are occasionally held together by the paint. That’s precisely why the stripping method matters: an aggressive method can move a door from the first category into the second.
Victorian Door Restoration in Berkshire
Berkshire has a lot of Victorian housing stock: Reading’s terraces in Newtown, Katesgrove and east of the centre, the villa streets in Caversham, and Victorian housing across Wokingham, Newbury, Maidenhead and Windsor. Much of it still has original front doors under decades of paint, and much of that paint contains lead.
There’s a local pattern worth knowing: many of these doors have already been stripped once, often by dipping, during the 1980s and 1990s when the practice was common. If your door was stripped before, the joints may already have been compromised, and that’s an argument for a gentler method this time round.
Conservation Areas, Article 4 Directions and Listed Buildings
Before you commit, check the planning status of your property. Reading, Wokingham, West Berkshire, Bracknell Forest, Slough and Windsor and Maidenhead all maintain conservation area maps and listed building records, and the relevant council’s conservation officer is the right place to confirm.
Conservation areas. Restoring and repainting an existing door doesn’t normally require consent. Replacing a front door on a house is often permitted development, but that’s exactly what an Article 4 direction can remove.
Article 4 directions. These withdraw specified permitted development rights in a defined area, frequently targeting the street-facing elevation: doors, windows, front boundary walls. Where one applies, replacing your front door needs planning permission even though it wouldn’t elsewhere. This is a strong practical argument for restoring the original door rather than replacing it.
Listed buildings. Listed building consent is required for works affecting the character of a listed building, and this includes the doors. Paint removal from historic joinery in a listed building can require consent in its own right; it’s a change to historic fabric, and the method matters. Always speak to the conservation officer before work starts, not after.
Flats and maisonettes don’t have permitted development rights for door replacement in the way houses do, whatever the conservation status.
What to Ask a Specialist, and What a Quote Should Include
Useful questions:
- What method would you use on this door, and why that one rather than the alternatives?
- Have you tested for lead, and how will lead paint be contained and disposed of?
- How will the original glass and the ironmongery be protected?
- Will you do a test patch before treating the whole door, and can I see it?
- Is the work done on site or at your facility, and how is the opening covered meanwhile?
- What happens if you find open joints or rot once the paint is off?
- Is neutralising and drying included, and what drying time do you allow?
- Does the price cover stripping only, or repairs and finishing too?
- How long will the door be off, realistically, including drying?
A clear quote should set out the removal method and the media or products used, whether glass and ironmongery are removed or masked, what happens to waste, what’s included and what’s extra, the expected period the door will be off, and what falls outside the quoted scope.
Blastec Sandblasting Services provides sandblasting and surface preparation across Berkshire, including wooden door sandblasting for period timber doors. If you’d like an assessment of your Victorian front door and a recommendation on the appropriate removal method for its condition, paint history and glazing, get in touch with Blastec to discuss the project and arrange a quote.
FAQs
Can you sandblast a Victorian door?
Yes, with the right media, pressure and operator control. Soft media such as sodium bicarbonate or walnut shell, at controlled low pressure, can remove heavy multi-layer paint while following mouldings and profiles. What isn’t appropriate is hard mineral grit or high pressure, which will cut the softer grain bands and round the detail. Where lead paint is present, the work needs proper containment, dust control and waste handling, which is why it belongs in a facility rather than on a driveway. A test area on the door itself is the reliable way to confirm the approach before committing.
Will dipping loosen the joints?
It’s a genuine risk, and the main reason dipping is a poor fit for Victorian doors. Hot caustic solution breaks down the animal glue used in period joinery, so joints that come out looking intact can work loose over the following months as the door moves with the seasons. Immersion also saturates the timber, which causes swelling and then shrinkage as it dries. If a door is going to be dipped, it should really be one where a joiner is prepared to take it apart and re-glue it afterwards.
Can you dip a door with original glass?
It isn’t advisable. Old linseed putty softens and washes out in a hot caustic tank, and the thermal shock of going into and out of a hot solution can crack original glass. Etched, frosted and flashed decorative glass can come back cloudy or further etched, and none of it can be replaced like for like. If the glass is original and can’t be removed, choose a method that treats the door in place: hand-applied chemical or poultice stripping, or shielded blasting with proper masking.
How long can the door be off its hinges?
It depends on the method and on what’s found under the paint. Blasting or hand stripping can be quick, but the work that follows takes time: neutralising, drying, repairs, priming and finishing. Any process involving water or immersion needs real drying time before finishing, weeks rather than days, measured with a moisture meter rather than guessed. Ask for a realistic timescale including drying, and arrange a temporary door or secure boarding for the opening. Rushing the drying stage is the most common cause of a finish that fails within a year or two.
Do I need permission to strip my front door?
For most houses, no. Restoring, stripping and repainting an existing door in its existing style normally doesn’t require planning permission, even in a conservation area. Two situations change that: listed buildings, where listed building consent may be required for works affecting historic fabric including paint removal; and properties where an Article 4 direction has removed permitted development rights, which can affect what you’re allowed to do to a street-facing door, particularly replacing it. Check with your local council’s conservation officer before starting. There’s no planning issue with the lead paint itself, but there are practical duties around containment and waste disposal.
Is soda blasting safe for etched glass?
Not without protection. Etched and frosted glass has a deliberately roughened surface, and abrasive media can abrade it further or leave it cloudy, and there’s no repair for that. Soda is among the softer media, which helps, but “softer” isn’t “safe”. Where original decorative glass is present, it should be removed before treatment where that’s practical, or properly masked and shielded where it isn’t, and the operator should be working away from the glazing rather than across it. If a contractor is relaxed about blasting over original etched glass, ask more questions.
Verdict: Which Method for Which Door
- Heavy paint build-up, deep mouldings, sound joints, glass removable or absent, controlled low-pressure media blasting. Fast, follows the detail, minimal mechanical impact on the timber when the media and pressure are right.
- Lead paint confirmed, significant original glazing, delicate detail, poultice or hand-applied chemical stripping. Slower and more expensive, but the paint lifts rather than becoming airborne, and the timber surface is barely touched.
- Light paint build-up, detail still crisp, hand stripping and careful hand sanding. The cheapest route, and realistic DIY provided lead has been ruled out.
- Already open joints, splits or extensive rot: the gentlest available method, alongside joinery repair. Avoid anything that saturates or stresses the structure further.
- Plain modern door of no particular value; dipping is a reasonable economy. On a Victorian front door it rarely is.
- Not sure which category the door falls into; that’s what an inspection is for. The assessment costs far less than reversing the wrong decision.
Whichever method suits your door, the principle holds: removing the paint is the part everyone thinks about, and repair, drying, priming, and finishing are where the door’s next fifty years are actually decided.